It’s hard to believe Summer is officially here. I’ve compiled a list of 5 of my best tips/tricks/products to make the next few months of longgggg summer days together a little bit easier! 😘
1) ☀️Applying sunscreen to kids is a full-time job during the summer. I found these fun zinc sticks that work like faceprint and my kids loved using them last year! Just replaced my stash to have on hand this summer!
2) 🫧 Bubbles are life for kids- especially toddlers. I posted this recently on instagram, but I JUST figured out a way to avoid the inevitable spilling of bubbles meltdown! I’m sure you kids are like mine and want to do *everything* themselves 🫠 Tape the wand to something (I have it taped to our basketball hoop) and BOOM independence and lack of spills!
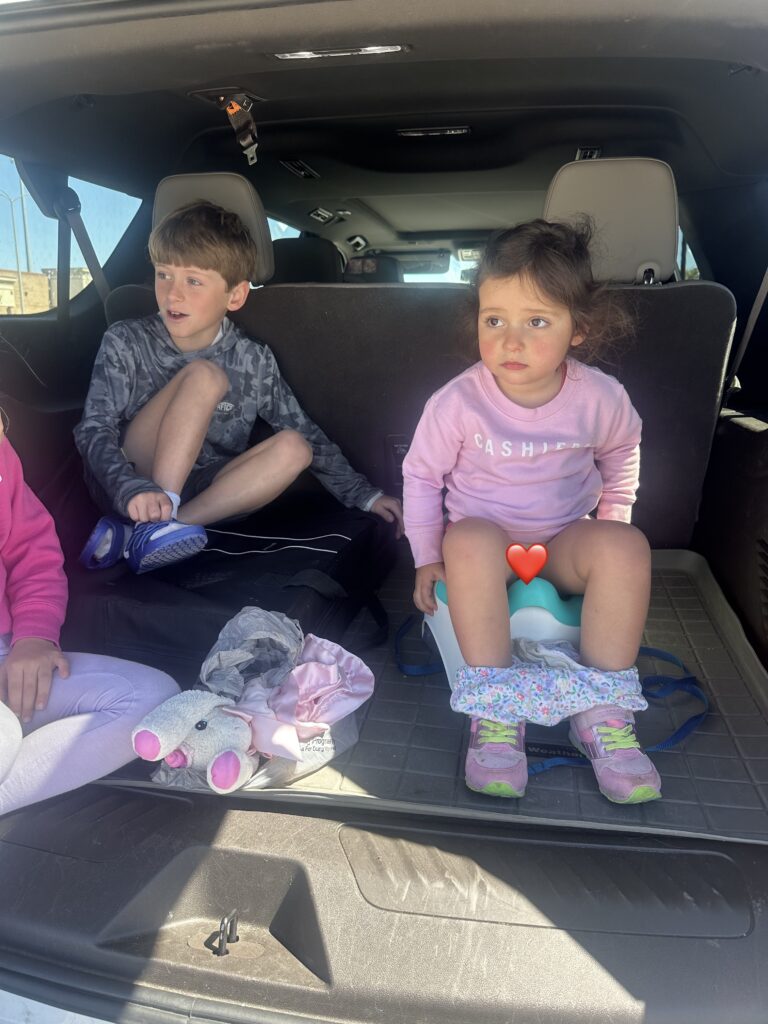
3) 👙Yet another parenting hack I wish I knew sooner: the swim diaper layer!When headed to the pool, put on the swim diaper, and then layer a real diaper on top for the car ride. When you arrive, simply remove the real diaper and pull the bathing suit back up!Swim diapers aren’t absorbant, hence why you can wear them in water. So, if the child pees on the ride there, you will be dealing with a soaked car seat 👎🏼
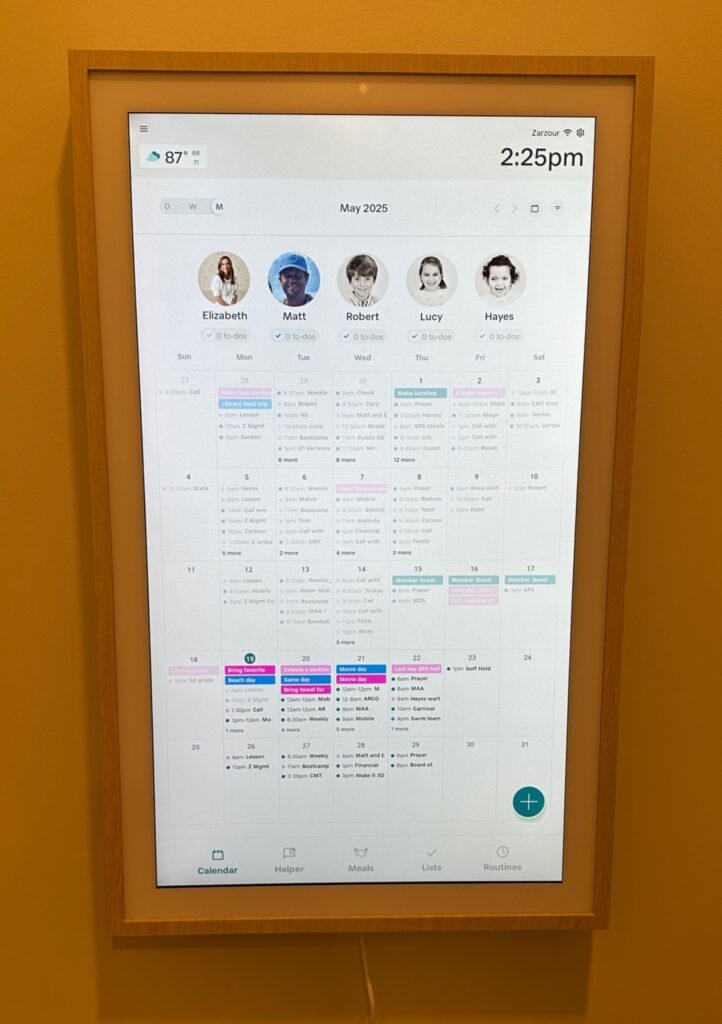
4) 📆 One of the hardest parts of summer to me is all of the logistics. All of the camps, lessons, trips, parties, etc are so fun… but can be a headache to keep track of (especially with multiple kids!) I have been using our Hearth Display since Christmas and let me tell you, it has changed the game for my mental load. It is simple to use, and everyone’s schedule is all in one place! Can’t recommend it enough. Use my link to get $40 off!
5) Finally, if you plan to travel at all this summer, and you have a child age 0-3, you NEED a slumberpod. Hands-down my favorite travel item to ensure everyone gets the best sleep possible! My link gets you 15% off any purchase on their website. The travel sound machine is also one of my favorites! (It has a shush feature for newborns!).
As always, if you need ANY help with sleep or have questions about travel/routines/etc, I’m here for you! Reach out and let’s start your summer off well rested!
Do you have a toddler (12 mo+) who refuses to eat a solid meal and/or is still waking at night?! You are not alone. Picky eating and night waking are concerns I hear a lot from parents! As a Speech Therapist and Sleep Consultant, I am qualified to address both of these issues. I have pin-pointed a common factor that could be adding to, or even causing, these frustrations.
I want you to stop and think about your child’s day. Now, I want you to think about the amount of times you are poring milk into a sippy-cup and giving it to them. Be honest, how often are they getting a big-ole cup of milk? If it’s more than a small serving WITH MEALS, we may have found the culprit.
FYI, I am not anti-milk. I don’t think you should stop serving it altogether! I do, however, think you should stop serving it in these situations:
Before/after/ in-between meals
Before a nap or bedtime
While they are just chilling on the couch watching tv
If they are upset and use it as a comfort item (red flag for potential sleep issues!)
Picky Eating
Let’s deep dive a little more here. If you child is a picky eater or refuses to sit down and eat a real meal… really think about their milk intake. If it’s pretty high, they most likely just AREN’T HUNGRY! Same thing goes if your child is having a snack every 30 minutes during the day. They are satiating their hunger just enough to not be interested in a meal! Not to mention, a ton of dairy can be extremely constipating…which affects appetite as well!
Solution? Move milk servings to only be served with a meal while they are sitting. If they choose to only drink the milk, that’s on them. But they do not get another serving, and certainly not when the meal is over to “fill them up”. That continues this vicious cycle you are already in. Offer them water, and maybe an occasional juice, for their fluid intake and watch as their appetites magically grow!
Night Waking
If you have a toddler that is still waking at night, it could be due to a myriad of reasons! If you are having trouble putting the puzzle pieces together, never hesitate to reach out to me and book a free consultation. We can discuss whether a 1:1 sleep plan would benefit your family!
Now, if your toddler is drinking a sippy cup of milk as part of the bedtime routine… we have have found the culprit ( or at least one of them). We don’t want milk to be a comfort item. Milk right before bed can cause blood sugar to spike/turn their digestive systems on in the middle of the night and cause their bodies to wake up. Not to mention, it’s bad for their teeth! Create a new bedtime routine, minus the milk, and see if that helps fix your night wakings!
If any/all of this seems overwhelming, I’m here to help! If you don’t know where to begin with your child’s picky eating and night waking, we can book a quick-fix call to review some strategies! I want you to feel confident in your ability to get some better habits in place and get your toddler eating and sleeping so much better!
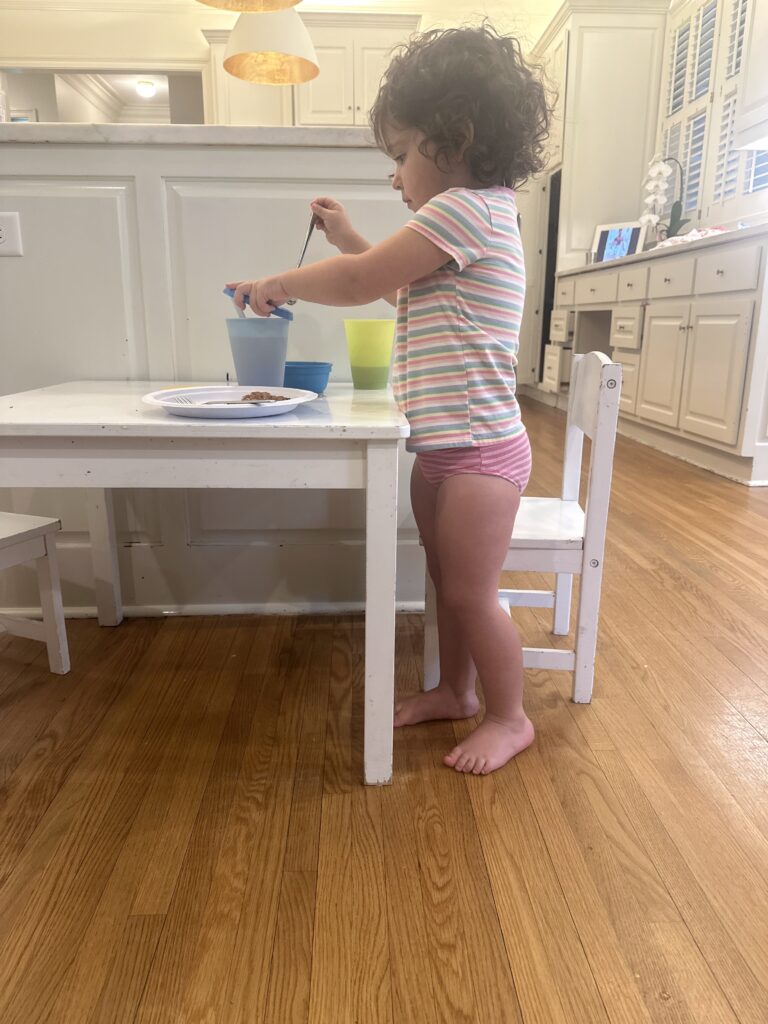
I have successfully potty trained three kids now within in 3 days! I truly believe potty training is one of the most frustrating undertakings of parenthood. It’s messy, tedious, and uses every ounce of your patience. Here are a few tips I have learned after doing this 3 times:
Make sure they are really ready
This is a HUGE part of successfully potty training in 3 days. You don’t have to potty train the second your child asks to sit on the potty or the moment they turn 2. This was a mistake I made with Robert, my first. I tried, and failed, right when he turned 2 just because of social pressure… but he wasn’t actually ready! So, we hit a reset and waited a few months until he really showed interest.. and them BOOM it clicked.
I also like to build a good foundation of potty/bathroom tolerance and awareness before starting. Let them watch you/older siblings go potty. Have them flush the potty (to desensitize them to the loud noise), place them on the potty and read them a book, etc. Do this over and over again, make it a part of your daily routine. Get them comfortable and familiar with the room, sounds, and sensations of the bathroom weeks, or months, before officially starting. This will give you a big head start!
Be prepared!
For 3 days you will be staring at your toddler all day and can’t leave the house, so make sure you have all supplies on hand and ready to go!
I created a list of all of my potty training must- haves here.
Keep it positive… but don’t overdo it
My must-have list includes little treats to have on hand to give them when they make it to the potty- BUT I don’t give one every single time they go. That can turn into a power struggle and distract them from actually listening to their body cues that they have to go. They end up just sitting on the potty to squeeze out a few drops just to get a skittle- not what we are looking for! I randomly give them a tiny treat throughout the day when they make it to the potty (like maybe when they self-initiate and make it there!) but NOT every single time they go.
What I DO do every single time/ all damn day is praise them for going. Nothing insanely over the top, but a reminder I am proud that they are tee-teeing/ poo-pooing on the potty! They should be proud themselves too! Use older siblings, call grandparents/aunts/uncles, etc and have the child tell them they went on the potty! The more pride they have in themselves, the better!
Don’t be afraid to call an accident “yucky”
You are going to want to scream when they pee on the floor for the 10th time that day, but you can’t! Remember, we want to be POSITIVE, and never shame them. What you can do, is say “uh oh yucky tee tee/poo poo in your undies!” and take them right to the potty to sit on it. This is why it’s so important to catch every single accident when it happens. As soon as you see them start going, pick them up and rush them to sit on the potty. Doing this over and over again will help their brain eventually click into initiating heading to the potty when they start to feel the urge to go!
We want them to associate clean and dry underwear with GOOD and messy/wet underwear with BAD. We do this by calling the accidents yucky. stinky, ew… but never by getting mad at them for having one.
Repetition, repetition!
All day long, like every 5-10 minutes, you are going to ask them if they need to go to the potty. You are going to sound like a broken record, but again, repetition is key!
You are also going to ask them over and over if their underwear is dry, and when it is give them praise! “Good job! Keep your underwear dry! Let mommy know if you have to go potty”.
Speaking of repetition, they need a million opportunities to go in order to learn within 3 days. SO, pump them full of any and all liquids they like. (in my must-haves list I included some lower sugar lemonade mix and popsicle options that worked great!) The more they go- the better! As for pooping, make sure your child is not even slightly constipated before you start. High fiber foods, smoothies, or even some miralax (if chronically constipated) before and during training will help immensely! We want going poop to be an easy process for them during training.
Put them in underwear
Some methods out there include them being naked from the waste down, but I feel it’s important for them to have underwear on! First of all, they have pride in wearing big-kid underwear and we want to remind them to keep them clean! Secondly, it is a great tactile reminder when they have an accident. They feel the underwear start to get messy and can catch it more often!
Finally, don’t let people out there tell you that they aren’t potty trained/it won’t work if they still use a pull up at night and for naps. HELL NO! Not even a little bit true. WHY in the world would you ask for accidents and broken sleep?! Staying dry at night is something that comes with age, it has absolutely nothing to do with being potty trained. So, save your sanity, and your sheets, and put them in a pull-up! Put them on the potty before a nap/bedtime and right when they wake up. Don’t let them hang out in the pull up, immediately put them on the potty and back in underwear. Resume training!
While I am NOT a potty training expert (aka I’m not certified like I am for sleep consulting) I am happy to get on a quick fix call and talk through strategy with you! If potty training AND sleep are an issue, I’m definitely your gal- we can make a plan for both! Reach out and let’s get started!
Halloween on a school night.. talk about scary!! 😱 But then, throw in Daylight savings just a few days later… oh my.
First of all, take a deep breath, this will be ok! Set your expectations of getting them to bed on time very low. They are going to be over-stimulated, over-served with sugar, and potentially over-tired. Here are my tips to have the night run as smoothly as possible:
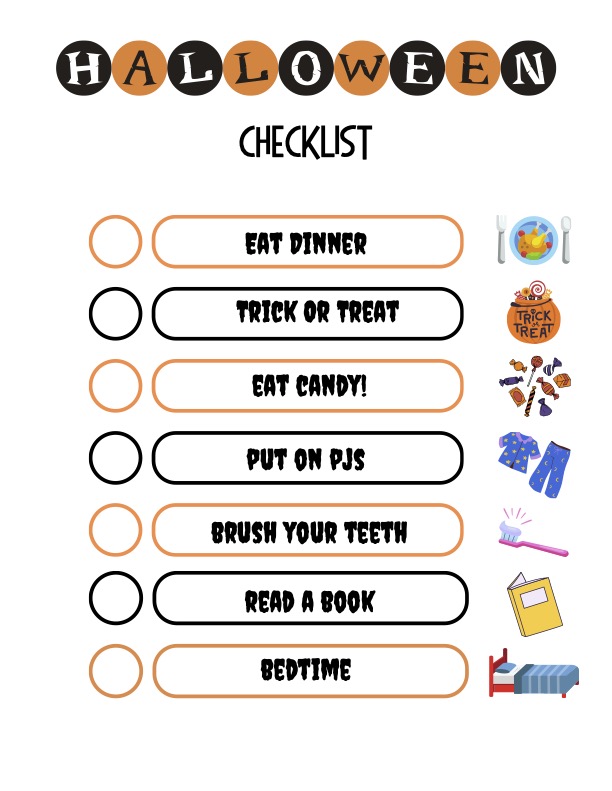
1) Download this checklist (for free!) to give them a visual idea of how the night will go. Offer a prize the next morning if they get all the checkmarks on the list! This will help keep them on track after Trick or Treating when they are super excited and difficult to settle.
2) Get a good dinner in them BEFORE Trick or Treating. Offer them something that you know they will eat, this is not the night to make them eat something new.
3) Once home from Trick or Treating, remind them of the checklist and set a timer and let them sort/eat/play with all their goodies for 10ish minutes. Then, have them save the candy for tomorrow (maybe they can get a piece with breakfast as their prize for completing the checklist tonight!) and move on to the next item on the list.
4) Use the “read a book” time after pjs to either read or book, or just talk about the night with them! Take this time to help them calm/wind down and process the big night they just had!
5) Remember to HAVE FUN with them. Make memories! It is ok if they don’t get in bed until later, one off night will not hurt them!
*This applies to school-aged kids. 3 and under should be easier to keep on schedule, but feel free to use this chart with them as well!*
As for Daylight Savings..
Whether it is springing forward or falling back, daylight savings can be a time of stress for parents. There are A LOT of tips and opinions out there…. all of which seem to be nothing more than a lot of extra work and math for parents! A common one is “starting a week before the change, start moving bedtime up/back 15 minutes each day.” Yadda Yadda. You certainly CAN do this. But, my solution on all things sleep is no B.S./make it as simple as possible/direct to the point answers. That’s what you are here for right?!
My take on Daylight Savings? Just dive into it. Keep everything the same. You may have one or two early mornings or rough bedtimes, but as long as you continue to set your expectations and hold your sleep boundaries, most kids adjust as quickly as adults do. Some kids don’t even notice the change!
This is why it’s so important to have a good independent sleeper. They can take these changes in stride because they have all the skills needed to go with the flow when it comes to schedule changes. Sleep training actually improves sleep flexibility and builds life long skills of healthy sleep habits! So, the only reason to stress going into Daylight Savings, would be if you were starting out with a crappy sleeper anyway! But, we can fix that, don’t worry! 😉
In summary, no need to pre-plan if you don’t want to. (I don’t) Handle any sleep disruption that may come like you would any other regression. As always, reach out if you need any extra support by emailing me here or messaging me on instagram.
I have had three babies with MPSI (Milk Protein and Soy Intolerance) and GERD (Gastroesophageal Reflux Disease). Not only are the diagnoses a mouthful, but caring for a baby with them is a handful, to say the least. While I am only techincally certified to advise on sleep, speech, and feeding, I wanted to write this to share my experience. I hope it makes you feel less alone on this journey and maybe gives you some ideas you haven’t tried yet.
Always consult your Pediatrician or GI (gastroenterologist) before introducing anything new!!
First of all, both of these conditions require a diagnosis by either a Pediatrician or GI. I personally prefer having a GI follow my kids, as they specialize in treating these conditions. So, if you think your baby may have one or both of these diagnoses, don’t be afraid to ask your Pediatrician for a referral to a GI! You won’t regret getting another set of eyes on your situation, I promise.
Robert:
Robert, my firstborn, was the definition of a “colicky” baby. Not only did he cry all the time, but he wouldn’t sleep unless being held, and then he started refusing to eat. I was dismissed every time I voiced my concerns because he was still gaining weight. I don’t know how this was possible since most days I was lucky to get a total of 12 oz into him. My entire day was spent trying to get 1 oz in at a time. I had a process where I would get him sucking on a pacifier, he would start to doze off, and then I would slip the bottle in until he noticed and started screaming. I would replace the pacifier and start all over again. This is how he ate. It was exhausting to say the least! Forget about anyone else feeding him a bottle.. it was an art form only I could do. Which only confounded my anxiety. Babysitters, Grandparents, even my husband couldn’t figure it out, and I would have to come home and feed him.
A typical day: He took 4 oz total after trying all morning and afternoon to get it down.
Since he was still gaining weight, I was told some babies are just “fussy eaters.” I spent so much money trying out every single bottle under the sun, thinking maybe the bottle was the issue… nope. I knew something was wrong, so I asked for a GI and Feeding Therapist referral. In the meantime, I was told to put him on rice cereal and was given an antacid medication just to pacify me. I now know that rice cereal is never a fix for these kids (in fact, it can inflame them more and is an aspiration risk!), but I didn’t know that then! So, we tried the rice cereal and the medicines while I waited to see the GI and Speech Therapist.
Like most first-time moms, I was very anxious about what I put in my baby’s pure little body. If I couldn’t breastfeed, I wanted him to get the purest and cleanest formula out there. So, I was devastated to find out there was no organic hypoallergenic formula when the GI suggested we put him on one. I decided I had to give up the obsession with clean ingredients in order for him to start healing. So, we put him on Alimentum, and he started to improve! By nine months old, I had weaned him off all of the reflux medications (Famotidine and Lansoprazole), and he was tolerating dairy! YAY!
Lucy
Now, my daughters are a different story. I knew from the start that there was a very high likelihood they would develop MPSI and GERD, as there is a strong genetic correlation. I considered breastfeeding and doing the full elimination diet, but I knew my postpartum anxiety would go haywire if I had to read a label every time I ate! So, knowing my second child, Lucy, would most likely have MPSI, I immediately put her on a European brand of formula that was organic and hypoallergenic (yay!). I thought we would be smooth sailing… but nope! After four weeks on that formula, she was officially having visible mucus and blood in her stools (damnit!). So, back to the GI I went. Because she was still reacting to the hypoallergenic formula, she needed to be put on an Amino-Acid based formula (we chose PurAmino). Once again, I hated the ingredients, but I gave in because there was no better option for her. She started to improve, but it took a solid month to really notice a difference. She had all of Robert’s same symptoms of refusing bottles and horrible reflux pain… but she did sleep better than he did!
Lucy rocking it! The amount of photos I have of my babies eating bottles… It never got old when they actually did it!
Hayes
Finally, with my third child, Hayes, I was determined to get it right from the start! A new formula had come out that was organic, dairy-free, soy-free, and didn’t use corn syrup… FINALLY! It was a Pea Protein-based formula by a company called Baby’s Only. The formula is technically only approved for use with toddlers. However, it meets all the nutritional requirements for an infant formula! The FDA has a lot of red tape for getting a formula approved for infants—it can take years! I liked what I saw: the ingredients were amazing, and it was SO much cheaper! So, this was a no brainer. She absolutely thrived on it! She still needed reflux medications, but her symptoms were not nearly as bad as her brother or sister’s.
See?! Even with my chunky baby #3! An easy feed never gets old.
I wanted to write all of this down to let you know I truly have been there. It’s SO HARD! I am always happy to talk with a MPSI/GERD parent to talk through options! I was that parent desperate for someone to tell me, “I get it, this sucks!” So, while I cannot diagnose or treat these conditions, I can be a sounding board for ideas on how to get through it. Because you WILL GET THROUGH IT! Contact me via email or instagram and let’s chat!
I cannot WAIT for my kids to go back to school. BUT, I need to undo some bad summer habits before they start. Anyone else?! 😬 Ok, let’s do it together: As we start to think about the upcoming school year, I wanted to share some tips on helping your child get a good night’s sleep. We all know how important it is for our kids to be well-rested and ready to tackle each school day!
Here are a few simple ideas to help establish a healthy sleep routine before school starts:
Set a Consistent Bedtime: Anyone else been letting their kids stay up WAY too late this summer? 🙋🏻♀️ Start moving bedtime earlier by 15 minutes every few days leading up to the first day of school. This way it feels like less of a shock when they have to go to bed so much earlier than they have been this summer! Consistency is key to helping your child’s body adjust. Need help figuring out your child’s ideal bedtime? Email me, and I’d be happy to assist!
Get Back to That Bedtime Routine: Whatever your normal routine was before summer, let’s get back to it! At our house it’s dinner, bath/shower, play time (yes, playhere is a link to my post about the benefits), brush teeth, books, then bed! Get back to your routine now so you aren’t fighting them the night before school starts!
Start to Limit Screen Time: I’m just as guilty of using the TV as a babysitter this summer! If you have trouble winding your kids down before bed, try to turn off electronic devices at least an hour before bedtime. (Swap out your bedtime routine with play time instead!) The blue light from screens can interfere with the natural production of melatonin, the hormone that makes us feel sleepy.
Ensure a Comfortable Sleep Environment: Make sure the bedroom is cool, quiet, and dark. A cozy bed and a favorite stuffed animal can also help your child feel secure and ready to sleep.
Be a Role Model: Children will mimic their parents’ habits. Show them the importance of sleep by prioritizing it yourself. The physical and mental health benefits of a good nights sleep are innumerable!
Establishing a good sleep routine now can make a big difference when school starts. A well-rested child is more likely to be attentive, perform better academically, and be in a better mood overall.
Wishing you and your family a smooth transition back to school! As always, reach out if you need any more help.
You finally have a baby that sleeps great… and then BOOM they are a toddler and all hell breaks loose! They suddenly protest bedtime, become masters at stalling, and have very big opinions! Don’t worry, we can fix this! I am starting a new “my favorite things” series! After polling y’all on instagram last week, we will be starting with my favorite toddler sleep item!
Drum roll….
It’s a colored night light system! These are A MUST for training your toddler to stop fighting bed time, stay in their bed all night long AND wait until a reasonable hour to get up in the morning! These issues are SO common with toddlers. But, the problem is, they are too young to understand the concept of time! Enter…. a colored light system. Telling a toddler it’s 7:30 and time for bed means nothing to them. Tell them “the clock is red , it’s time for bed!?” They get that instantly! Let’s talk about some of the options, and then I’ll tell you how to use them!
My top picks:
The Hatch rest ($69) and the Momcozy ($39) are both very user-friendly and work through an app. I love this set up for times when they are sleeping in, and you need to *last minute* switch the clock to turn green at 7:30/8:00 instead of 7:00. Never had a kid sleep in before? Stick with me, my friends 🙂
How to use it:
Now that you have chosen your clock, let’s learn how to use them!
Introduce the clock to your child and explain how it works. “When the clock turns red, it’s time for bed. We stay in our bed allllll night until the clock turns green!” Practice with their stuffed animals/baby dolls/favorite super hero, etc. Put them in their bed when the light turns red, then 1 minute later turn the light green and act excited for the stuffed animal to get out of bed!
Establish a rewards system as they learn to use this. I like to use a sticker chart. They get a sticker every night they stay in their bed all night long until the light is green! I created a bedtime sticker chart you can use for this here!
HOLD THE BOUNDARY. If you are committing to this red light system, do it! If you waiver and let them delay bed time/get out of bed/come into your bed this will not work! Stay calm and consistent and hold firm! “The light is red it’s time for bed”
If you need any additional assistance with this, or anything toddler sleep related, reach out and let’s do a $99 Quick Fix call and I can walk you through any additional questions you may have.
As always, I’ve got your back and you’ve got this!!
Travel can be stressful, but add a baby/kid into the mix… yikes! Having a child in-tow (especially a baby) makes for even more variables we have to plan for! But, I never want you to miss out on any experience just because you are afraid to mess with your child’s schedule or routine. They CAN be flexible! Here are my best tips for traveling:
Leave early: Whether you are flying or driving, if the trip will take more than a few hours… leave EARLY. Book that early morning flight or plan to hit the road in your car first thing in the morning! This will give you more time to get your child adjusted to your new location and (if needed) get them to bed early after a long travel day!
Let go of the schedule: If you try to keep baby on their nap schedule on a travel day, you will fail… So, let them nap whenever and however they want to. And, if they don’t nap at all?? That’s ok too! Again, use that trick card of an early bedtime when you arrive at your destination so they can start fresh the next day!
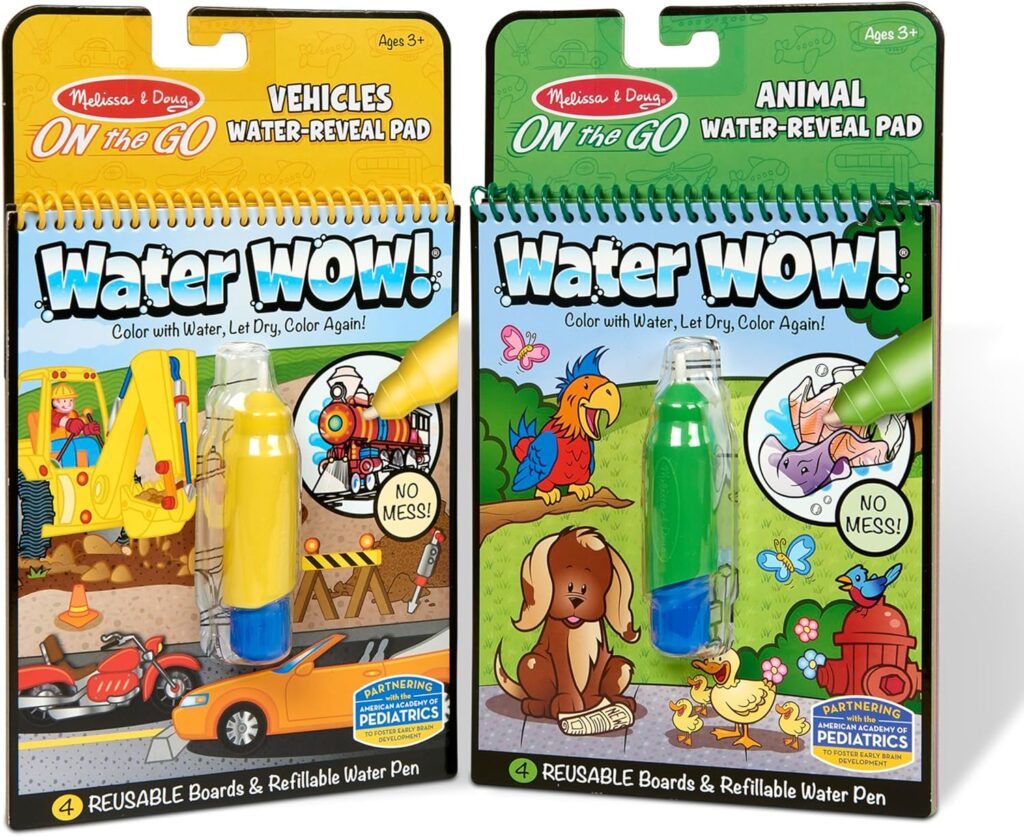
Pack all the snacks and screens: Buy those special snacks you don’t ever keep in the house and download a million things on their tablets/your phone to keep them entertained! One day of breaking the rules will not hurt them, and I promise you it will make your travel day easier! Go to the Dollar Tree or the dollar section of Target and get little activities and toys that are brand new and pull one out at a time while you travel. I’ve linked some of our favorite travel toys below!
4. Set up their sleep space first: The first thing you do when you get there? Establish where they will be sleeping and set up the travel crib with the Slumberpodon top. (if you don’t already own a Slumberpod, I linked it here and use my code EZSLEEP for a discount!) Next, plug in the sound machine and set up the monitor (a cheap audio monitor is all you need!) Get the space all ready so that when bed time comes, there will be less stress for everyone! Bring as many familiar things from home to cue their brain for sleep. If they have a favorite blanket, stuffed animal etc, bring it along! Let them play around in their new sleep space/room and get accustomed to it. Read a book in there or play a game of peek-a-boo, and then leave the room and start your vacation!
5. Use my packing list: You know that feeling of “I know if forgot something” at 3 am the night before a trip? Well, you can sleep easy my friends, because I created the ultimate packing list for traveling with a baby or toddler! Click hereto get it!
Above all, if you do not already have a good independent sleeper, let’s fix that TODAY so that your trip will be a restful one! Reach out and let’s get started!
Whether it is springing forward or falling back, daylight savings can be a time of stress for parents. There are A LOT of tips and opinions out there…. all of which seem to be nothing more than a lot of extra work and math for parents! A common one is “starting a week before the change, start moving bedtime up/back 15 minutes each day.” Yadda Yadda. You certainly CAN do this. But, my solution on all things sleep is no B.S./make it as simple as possible/direct to the point answers. That’s what you are here for right?!
The best thing you can do to help their (and your!) body adjust more quickly is sun exposure in the morning and evening. This allows your body’s circadian rhythm to set to the new hour.
My take on Daylight Savings? Just dive into it. Keep everything the same. You may have one or two rough mornings or bedtimes, but as long as you continue to set your expectations and hold your sleep boundaries, most kids adjust as quickly as adults do. Honestly, some kids don’t even notice the change!
This is why it’s so important to have a good independent sleeper. They can take these changes in stride because they have all the skills needed to go with the flow when it comes to schedule changes. Sleep training actually improves sleep flexibility and builds life long skills of healthy sleep habits! So, the only reason to stress going into Daylight Savings, would be if you were starting out with a crappy sleeper anyway! But, we can fix that, don’t worry! 😉
Reach out today and let’s make daylight savings a little LESS scary this year
In summary, no need to pre-plan if you don’t want to. (I don’t) Handle any sleep disruption that may come like you would any other regression. As always, reach out if you need any extra support by emailing me here or messaging me on instagram @e.z.sleep
Ok, let’s talk about swaddling. I had NO idea it was so controversial until I posted a reel on instagram demonstrating Dr. Harvey Karps’s “5 S’s of Soothing a Baby”. You can see it here. In the comment section I was berated, in multiple languages mind you, about how horrible I was for swaddling my baby. HUH!?
So, while I fully believe in swaddling a newborn for soothing and sleep- I’m here to say, if its not for you, that’s fine! I’m a huge supporter of “if it works for you, keep doing it”. There is no right way to raise a baby or child. I’m here to support you and meet you where you are. With all that being said, my job is to give you the facts- and the fact is, swaddling has been proven to soothe a newborn baby. It mimics the tight hug sensation of the womb, and calms their nervous system.
Now, obviously we aren’t keeping the baby swaddled all day every day. This tool is used for sleep and when baby may be over stimulated (aka the witching hour). During the other hours of the day when baby is awake we offer things like tummy time to develop their motor skills. I recently posted a video of how to properly swaddle a baby on my instagram page, but here are the non negotiables in safely swaddling a baby:
Swaddle safety:
Tightness– we want it tight, but not too tight. Make sure you can fit two fingers under the material wrapped across their chest. We also want their legs and hips to be loose to prevent hip dysplasia, so focus mainly on wrapping their arms down.
Breathability– make sure they aren’t getting over heated. I only use cotton swaddles for this reason. Also, make sure there is good airflow in the room they are sleeping in by using a ceiling or box fan.
Age– swaddling is for newborns only. If the baby is 3 months, or starting to roll, it’s time to stop swaddling.
Have any questions about swaddling? Send me a message! I teach all this and more in my Newborn Sleep Foundations package.